
7 Top Tips for Keeping Your Images Sharp
It happens to all of us at one time or another. You go through the shots you’ve take in a session on your camera’s screen and there’s one that stands out. Composition is good, you’ve captured the subject in just the way you wanted, there’s some interesting light. You pat yourself on the back and can’t wait to look at it on your computer.
Then – shock horror! That very shot that looked so great on a little 3 inch screen just isn’t sharp when viewed more closely. Even if you can do a bit work through editing, it’s still not going to be the masterpiece you wanted.
So here’s 7 top tips to keeping your pictures sharp as a tack.
1 – Hold the camera securely
Sorry if it sounds a bit obvious, but there is definitely a wrong way to hold your DSLR.
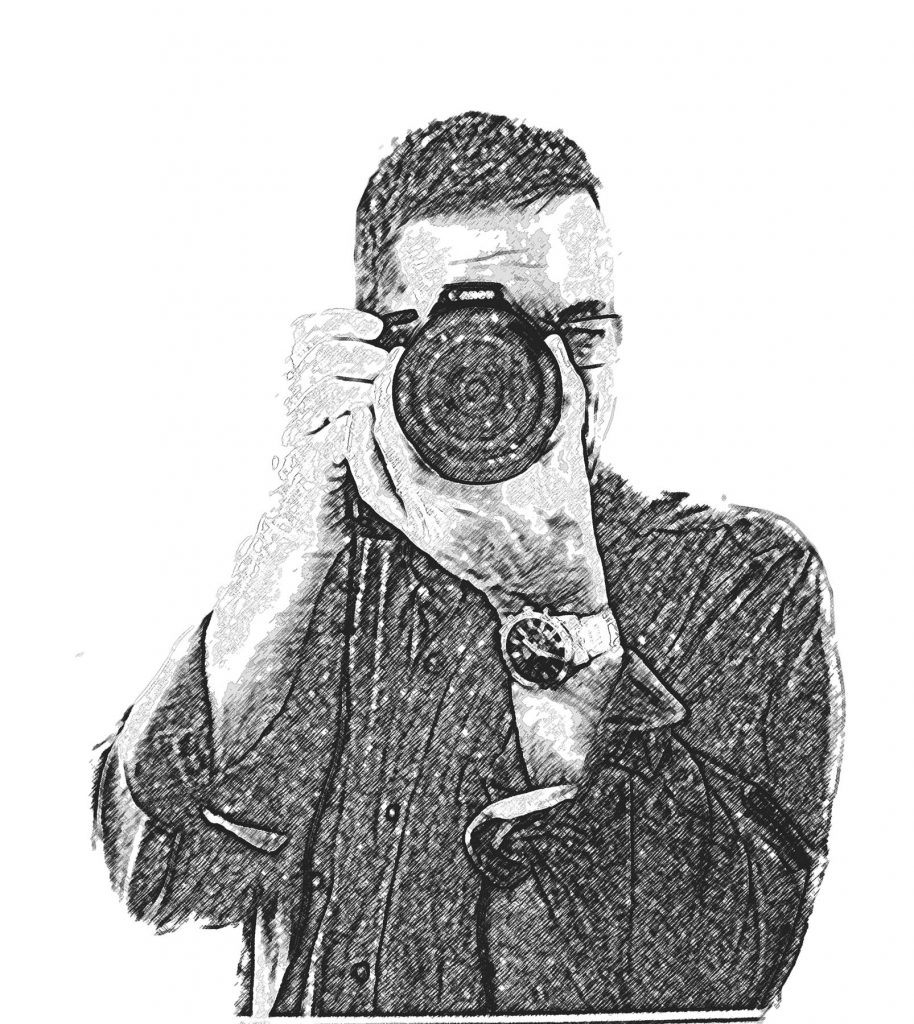
In the first illustration below, there is no support at all under the lens – and having your elbows splayed out means there’s not really a firm basis for holding the camera. Only the left thumb is actually supporting the weight, so the shutter hand (right) is having to take some of the weight too.

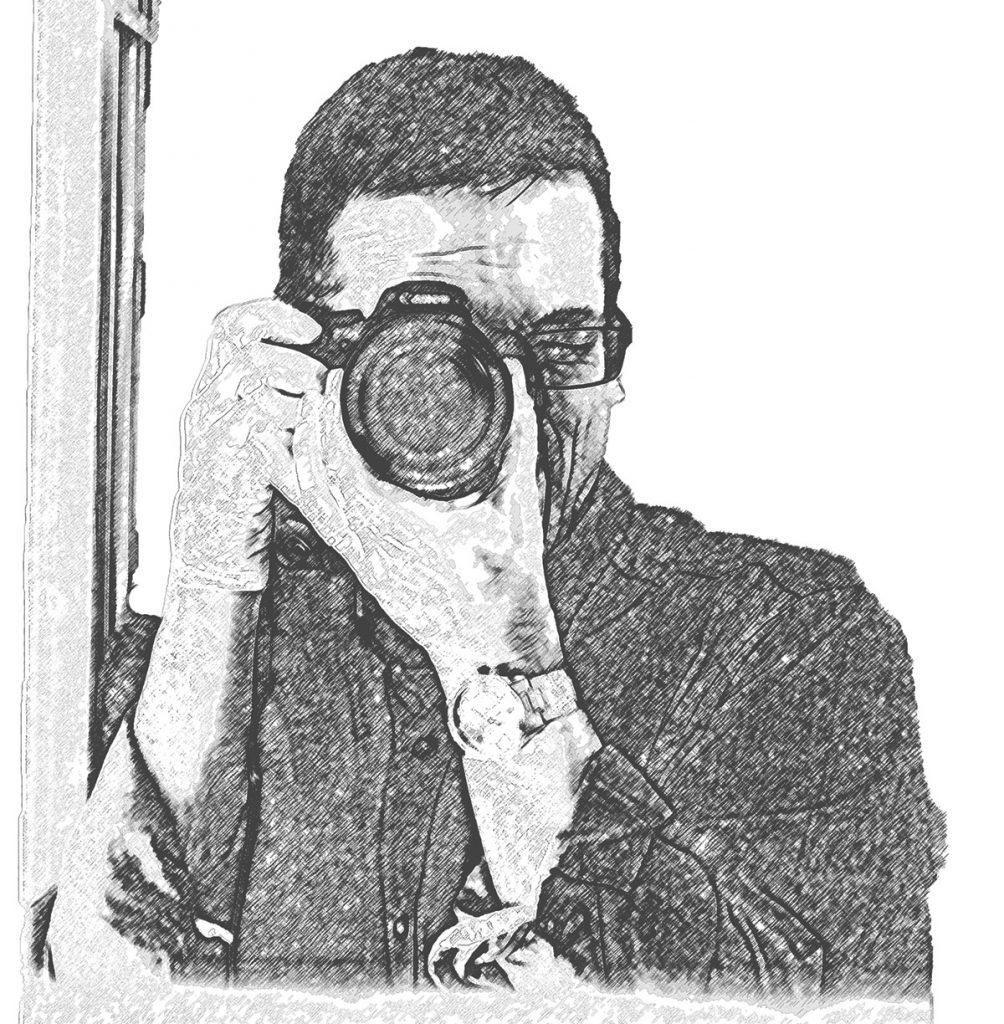
Pulling your elbows in means that your whole body is actually involved in firmly supporting the weight of the camera and straight away reduces the potential for camera shake. Also, get into the habit of supporting the lens with your left hand underneath. The base of your palm will then naturally support the camera and in this position the whole weight is being supported by the left hand – you can actually take your right hand away and the camera is still securely held.
To increase support even more, if there’s a wall, a tree or a door that you can lean on, do so (make sure it can support your weight – and that someone hasn’t opened it, you don’t want to do a Del Boy!!!).
2 – Stand Firm!
The way you stand can also provide a firm foundation for sharp images. Personally, I tend to stand with my body slightly turned to my right, with my weight shifted forward on to my front (left) leg.
The other approach is to stand fully face-on, weight evenly distributed on both legs and kind of ‘sitting’ back with your pelvis pushed forward a bit. This makes both elbows naturally tuck into the body.
3 – Switch on Image Stabilisation
If your lens has some kind of image stabilisation, switch it on. It will definitely help take a sharper shot. Here are a few examples of different brands and what they call their systems:
- Nikon – VR (Vibration Reduction)
- Canon – IS (Image Stabilization) – or some lenses may just have a switch labelled STABILIZER
- Sony – OSS (Optical Steady Shot) or SS (Steadyshot)
- Panasonic/Leica – MegaOIS and PowerOIS
- Tamron – VC (Vibration Compensation)
- Sigma – OS (optical Stabilization)
4 – Focus clearly
Auto-focus can sometimes lead you astray. Check out the recent post about Back Button Focusing to control focus better, but you can also take other steps to make sure you get focused on the right subject.
Depending on your camera model, it will probably have at least nine focus points, perhaps many more. If you have you have your camera set to automatically select which point to focus on, it may just decide to focus on the wrong subject!

Check how your points have been set. If you find that you are consistently getting less than sharp images, it could be that you have a different point set (maybe the far left) so each time you think you are focusing on an item centre frame, the camera actually finds something to the left to focus on!
Most of the time my camera is set to use just the centre point – and by using the Back Button technique, if I want my subject to be off centre, I can focus on it then re-compose the shot.
5 – Watch your Shutter Speed
If you have your shutter speed too slow, you are likely to end up with blurred images – either because you have moved the camera slightly or because the subject has moved.
The longer the lens you use, the more difficult it will be to keep the camera steady. As a general rule of thumb, to use your camera handheld without camera shake, your shutter speed needs to be based on the same number as your lens focal length.
So, if you’re lens is a 135mm you’ll need a shutter speed of at least 1/125 or even better 1/160. BUT you need to bear in mind that this for a camera with a Full Frame Sensor – if, like many of us, you have a Crop Sensor the shutter speed will need to be 1.6x faster. So your 135mm lens will need a shutter speed of 1/200 or 1/250.
Bear in mind that fast moving subjects will also need faster shutter speeds, so whilst you can avoid camera shake using the calculation above, a racing car at full speed is still likely to blur with a shutter speed on 1/160!
6 Breathe Out and Keep Still!
Most photographers recommend that you exhale smoothly and calmly then take the shot. This is a common breathing technique for many activities – golfers do the same and I imagine snooker players, archers and darts players do as well. In fact anything where you need the body to be still at the time of ‘action’.
Then, as you press the shutter keep absolutely still – and remain still for a second or so after you’ve taken the shot. Don’t move the camera, start to walk away or make any other movement until well after the shot has been taken.
7 – Use a Tripod
If the type of shot and circumstances allow, use a tripod – and if possible, use the timer setting to trigger the shutter or a remote button. A tripod means that there is no possibility of camera shake.

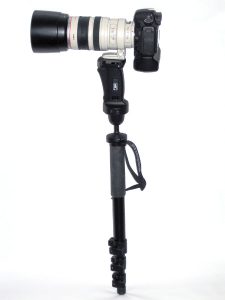
Another useful addition to your kit bag is a mono-pod. This gives great support when you are using the camera on location, particularly when using very long and heavy lenses. You still have to physically hold the camera or it will just fall over, but mono-pods are easier to move around with than tripods. Mono-pods are widely used in Sports Photography.
Do you have any useful tips for keeping images sharp – or for any other photography improvements? If so please put them in the comments section below.